Over the past year or two WordPress’ block editor (also known as ‘Gutenberg’) has made huge strides in capability, performance, and popularity.
With WordPress powering nearly 40% of the websites online today, more and more websites are making the switch from old, bloated page builders (like WP Bakery, Elementor, and Beaver Builder) to blocks to improve performance, ease-of-use, and help future-proof their website (learn more about why I recommend the block editor).
Sadly, there is no way to automatically convert a site from a page builder to blocks — it has to be done manually.
If you’re up to the challenge— it’s time to roll up your sleeves and get to work! This article is going to take you step-by-step on how to convert your existing website into an block-based website.
Don’t worry, if you get stuck you can always reach out. Through my completely done-for-you block website conversion service I’ve rebuilt countless websites, including ones built with WPBakery, Divi, Elementor, BeaverBuilder, and even Wix, into powerful and easy to use block-based websites.
And in case you’re wondering, the site you’re looking at now… Yep, 100% built with blocks!
And in case you’re wondering, the site you’re looking at now… Yep, 100% built with blocks!
Through all of those creations I’ve created a workflow that ensures you save time and get the job done right.
This is aimed at people who are already familiar with the WordPress ecosystem, and who have at least some experience with blocks. If you’ve never used a block package before, throughout the article I will link you to documentation and instructional videos to help supplement that knowledge as we will not be going step by step on how to use every feature.
This article is meant to give you a good grasp on the processes of converting your site, and what steps you should take (and in what order!).
Ready? Let’s go!
Make a Clone of Your Existing Website
If you already have a website on WordPress, then the safest way to get started is to make a clone of your site and do the conversion on what’s called a “staging site”.
This keeps your live website from being disturbed while you rebuild with blocks.
By using this method you’ll experience little or no downtime for your website when you make the switch to blocks.
How to Make a Clone of Your Website
Hosting companies, like Cloudways, allow you to easily make a clone of a website with one click. If you have this capability, go ahead and clone the website you want to convert to blocks and skip to the next section; “Decide on the best theme for blocks”.
If your hosting company does not have that capability— that’s okay. Like everything in WordPress, there are plugins that can help you achieve this.
From the backend of your existing website, go to ‘Plugins’ > ‘Add New’ and do a search for All-in-One WP Migration. This plugin will allow you to download a copy of your website that you can upload to a fresh installation of WordPress.
Once you’ve installed and activated the All-in-One WP Migration plugin follow the instructions to download a copy of your website.
Now that you’ve downloaded a copy of your website, you need to create a fresh installation of WordPress on your server.
Follow the same steps to install the All-in-One WP Migration plugin. Then follow the instructions to import the copy of your website you just downloaded onto your hard drive.
Now you should have an exact clone of your website that you can use to do your conversion.
From this point forward we will refer to the cloned version of your website as the “development site”, as that will be what you are using to develop your site with Elementor.
Decide on the best theme with blocks
There are thousands upon thousands of WordPress themes to choose from— which can be both confusing and overwhelming.
However, if you want to get the most out of blocks there are two themes that stand head and shoulders above the rest and will be more than enough to get the job done.
GeneratePress
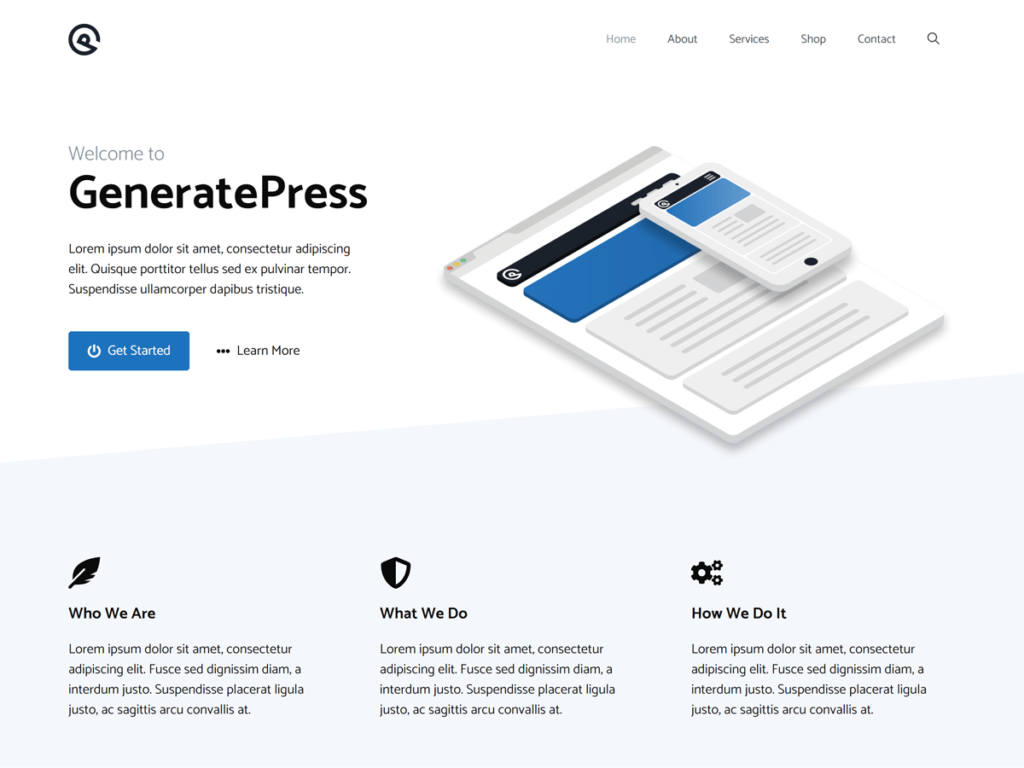
If you need all the benefits that come with the Customizer, then look no further than GeneratePress.
The GeneratePress theme, which requires a Pro version to access all its features, is one of the fastest and lightweight themes on the market.
Not only is it built specifically to be compatible with blocks, but it will also give you all the Customizer controls to style elements added by 3rd party plugins.
I typically opt for GeneratePress on most websites because of its combination of reliability, speed, and control.
I typically opt for GeneratePress on most websites because of its combination of reliability, speed, and control.
The free version of GeneratePress (found in the WordPress repository) works fine, but for just $59, the Pro add-on is worth its weight in gold and allows you to use the theme on up to 500 websites.
Kadence Theme
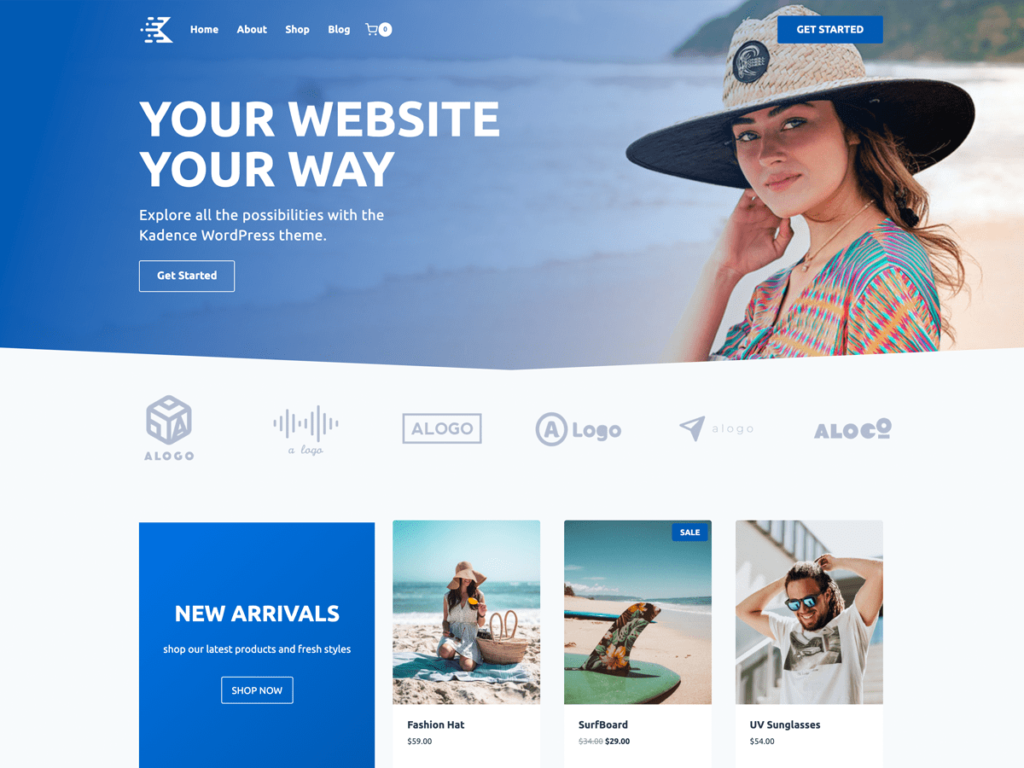
The Kadence theme is also built to specifically pair with blocks, but does come in at about twice the file size of GeneratePress (which will only matter if you are highly focused on performance).
There is a free version that can be downloaded in the WordPress repository, or you can opt for the pro version for $79 (significantly more than GeneratePress).
Kadence does come with more settings which could allow you greater flexibility as you try to recreate your old site — but that also means there are more moving parts and more things to learn.
Since you can test out both of these themes for free, I would suggest doing just that and seeing which one fits you best!
Theme Installation
Once you’ve made a decision on which theme you want to use, you’ll need to install and activate your theme.
At this point you’ll notice your website will likely look drastically different— if not completely broken.
Changing themes can have a dramatic effect on the look and functionality of your website. But don’t worry— that’s why we’re working with a clone of the live site, not on the live site itself.
If you’ve opted to use the Pro version of GeneratePress, you’ll need to install the Pro add-on, which comes in the form of a plugin.
After you purchase GeneratePress Pro, go to the back end of your development site and hover over ‘Plugins’, then click “Add New”. Install and activate the plugin file you received from GeneratePress.
You can activate all the individual add-ons that come with the Pro version of GeneratePress by hovering over ‘Appearance’ in the back end of your development site and clicking ‘GeneratePress’.
Take time to visit the GeneratePress documentation to familiarize yourself with all the options.
Install GenerateBlocks and GenerateBlocks Pro
To be able to accomplish all you’re gong to need to with your blocks rebuild, you’re going to need a block package — and there’s no better package than GenerateBlocks (made by the same folks who produce the GeneratePress theme).
GenerateBlocks is free and can be downloaded from the WordPress repository (instructions below), but the Pro add-on is a premium offer that will run you another $39 (a small price to pay for its robust set of features). You can see all the details and purchase your copy on the GenerateBlocks website.
Installing the Free Version of GenerateBlocks
To install GenerateBlocks, from the backend of your development site go to ‘Plugins’ > ‘Add New’ and do a search for “GenerateBlocks”.
Install and activate the plugin.
Purchasing and Installing GenerateBlocks Pro
If you don’t already have a copy of GenerateBlocks Pro, visit the GenerateBlocks website and purchase your copy.
You have the choice to buy a license for 1 site, 10 sites, or 250 sites. If you plan on using GenerateBlocks for multiple websites you can get quite a discount on the multiple site plans.
Once you’ve made your purchase, upload and activate the GenerateBlocks Pro plugin on your development site.
Setup All Your Theme Styles
Even though your site may look in disarray now, soon you’ll start to recognize it again as you start to set the Customizer in your chosen theme (I’m going to assume you chose GeneratePress, but if you chose a different theme the rest of the instructions will be similar).
GeneratePress gives you the ability to set up global styling for fonts, colors, buttons, forms, and other items on your website.
This is the best place to start, as these settings will apply to every page across your website— which is a lot faster than setting each element individually on a one-by-one basis.
To access GeneratePress’ theme styles you’ll have to open the Customizer, which you can get to from the back end of your site by hovering over “Appearance” and clicking “Customizer”.
Here you’ll see settings for all kinds of areas of your website including; Site Identity, Layout, Colors, Typography, Background Images, General, Menus, Widgets, and Additional CSS.
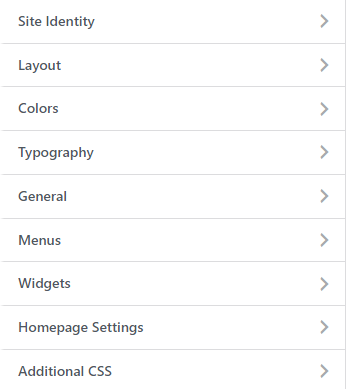
We’ll take a moment to go through the most important areas you want to configure next.
Site Identity
Under the Site Identity tab, you’ll find a few important fields for your website, including the Site Title, Tagline, Logo and Site Icon. These items might already be set correctly from your previous website’s settings, but it’s a good idea to double check them while you’re here.
Layout
Opening the layout tab will unveil a nested list of options including Container, Header, Primary Navigation, Sticky Navigation, Off Canvas Panel, Sidebars, Blog, and Footer.
You have a lot of choices when it comes to determining the layout of your site, but what’s nice about doing this in the Customizer is that you have the ability to see how the change you make effect your site in real time.
Of all the sections in the Customizer this section will take the longest to go through, but go through each one trying the various settings until you find the layout that most closely matches what you are going for.
When you’re done configuring the Layout settings, your website should be starting to look a lot more familiar.
Colors
The colors section of the Customizer in GeneratePress will allow you to create a color palette that can be used globally across all your elements (in both the theme settings as well as GenerateBlocks).
It’s a good idea to comb through your old site at this point, sampling all the colors you need and writing down the color code in its HEX value.
Once you have all your colors you can add those to your theme to create your color palette.
From there you can assign all your global colors to the various elements on your website, including the Body, Header, Primary Navigation, Off Canvas Panel, Buttons, Content, Forms, Sidebar Widgets, Footer Widgets, and Footer Bar.
Typography
Similar to the color panel, the Typography panel will allow you to assign the fonts you need to load on your website. If you’re not sure what fonts you used before, you can use the free browser extension What Font to figure it out.
After you’ve loaded in the fonts you need for your website, you can apply the correct font family, font sizes, and other details for each element of your website.
You’ll want to set the font for your body, header, primary navigation and all of your heading levels (H1 through H6) at a minimum.
Chances are you’ll have to revisit this screen several times throughout the process to configure all the font settings you’ll need.
It’s always best if you can control all of your font settings from the customizer where you have more global control.
You will have the opportunity later, as you build out your individual pages, to override font settings, but it’s always best if you can control all of your font settings from here in the customizer where you have more global control.
Recreate Your Header & Footer
Whew! You’ve already gotten a lot accomplished! A pat on the back is in order before we dive into the real work of getting your website converted to a lightning fast block-based website!
At this point your development site should start to slightly resemble your live website— but do not be alarmed if there are still a lot of issues… We’re going to get to that.
Now that you’ve installed your theme and setup all your theme styling, the first thing you want to create is your Header and Footer.
Creating Your Header
Both GeneratePress and Kadence allow you to build out your header completely from the Customizer. In fact, your header may already be in good shape now that you’ve gone through all the Customizer settings.
In GeneratePress, you can configure your header in several sections:
- Layout > Header
- Layout > Primary Navigation
- Layout > Sticky Navigation (optional, mobile)
- Layout > Off Canvas Panel (optional, mobile)
- Colors > Header
- Colors > Primary Navigation
- Colors > Off Canvas Panel
- Typography > Header
- Typography > Primary Navigation
At the bottom of the customizer, you’ll 3 buttons showing different devices; Desktop, Tablet, and Mobile.

It’s important as you’re setting up your header that you view it in all three of these views to ensure your website is responsive. Many of the settings can be altered individually for each device type and it will take some fine-tuning to ensure your website is looking great across all screen sizes.
Creating Your Footer
If your footer is really simple, you may be able to do all you need to from the customizer by using Footer Widgets, but in my experience you’re going to need more control over your footer than the customizer has to offer.
So, let’s start working with GenrateBlocks for the first time, which we can use to build out a more complex footer section.
From the back end of your website (you can exit out of the Customizer), hover over “Appearance” and click “Elements”. At the top of the screen click “Add New Element” and from the popup choose the “Block” element type and hit “Create”.
On the left side of the screen will be your canvas to create your footer section. You’ll likely need a combination of a container, grid, headings, images, and paragraphs to design your footer (though, it’s hard for me to know without seeing it!).
However, there are a few important steps you’ll need to take in order to set this block as your site-wide footer.
On the Element panel on the right side of your screen, make sure that the “Element Type” is set to “Hook” and under the “Hook Name” choose “Footer”.
Just below the content area on your screen you’ll find your display settings, which will tell your block where it should display. Generally you’ll want the “Location” to be “Entire Site” and the “Users” to be “All Users”.
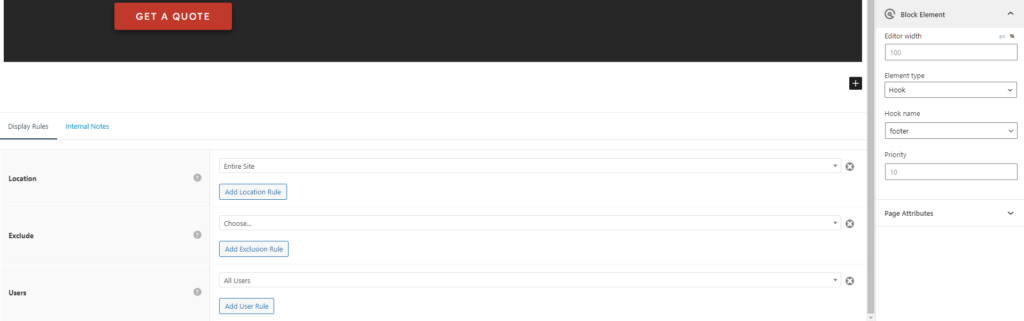
However, if you have more complex setups, GeneratePress gives you the ability to display different footers in different situations (for example, a different footer for logged in users or on specific pages).
Recreate All Your Stand-Alone Pages
Okay— now it’s time to get ready for the marathon! It’s time to create all your stand-alone pages.
When it comes to pages, there are two options that you’ll want to consider; Page templates and one-off pages.
If you have multiple pages that use a consistent layout, then you may consider building out a Page Template for those pages and applying that template to each of the appropriate pages.
This will save time as you only have to create one template and then apply it to multiple pages.
For completely unique, bespoke, or one-off pages you’ll want to create these individually with Blocks.
Either way you work, you’ll want to delete any of the content on your page that was created with your old page builder. If you’re just using the Classic or Gutenberg editor, you can leave that content in place.
Some page builders, like WPBakery, will leave behind nasty shortcodes that are a pain to clean up… If it’s easier, you can delete a page completely and then create it new from scratch. If you end up deleting and starting fresh, I recommend doing this one page at a time so you can pay close attention to the page slug / URL to make sure you name the new page the same as the old so you don’t break any links.
Page Templates
Creating a Page Template is similar to how you created your Footer. From the backend of WordPress, hover over ‘Appearance’ and click ‘Elements’. Again, you’ll want to set up a Block element, but from there you could have a myriad of choices (depending on your needs) of where you want the element to show up, if it’s brining in dynamic content, and where you want this page template to display.
Thankfully, GeneratePress has excellent documentation for all their features. Instead of reinventing the wheel here in this article (nevermind the fact that there could be 100 different scenarios and I’m not sure which apply to you), I would suggest hopping over to the Elements Overview documentation which will give you detailed instruction on all the different scenarios that you might run into.
Bespoke / Unique / One-Off Pages
For bespoke, unique, or one-off pages (like landing pages) you’ll need to create these individually using the block editor.
Open each page of your site, one-by-one, and recreate the pages using the tools within GenerateBlocks and default blocks that come with WordPress.
By now you should have the hang of creating with blocks. Though this can be quite monotonous, you should be able to make quick work of it.
If you’re completely lost and not sure where to start, then check out some videos by Mike Oliver who provides fantastic training on how to use GeneratePress and GenerateBlocks.
Setup Any Redirects & Audit Technical SEO
You’re website should now look completely done from the front-end. Congratulations!
Before you publish your website, now is a good time to run a few tests to make sure you haven’t made any mistakes like broken links or invalid markup.
A tool like WebSite Auditor will do a good job of scanning your development site and alerting you to any issues. You can download a free version of WebSite Auditor that will allow you to do everything you need, though it does have limitations on saving reports and a max-page scan size.
In most cases the free version will do the trick.
After you scan your site with WebSite Auditor go clean up any issues to ensure your website is in good shape before publishing.
If you changed the slug or URL to any of your pages, make sure to create the appropriate redirects using a plugin like Redirection.
Publish Your Built with Blocks Website!
Your website is now ready to publish and you’re almost at the finish line!
To publish your website back onto your live site, you’ll want to follow the same steps we used with All-in-One WP Migration. This time you’ll want to download a copy of the development site and import it in your live website installation.
It’s always a good idea to take an additional backup of your live site before you do this just in case anything goes wrong.
Once the new site has been published, and since you already have WebSite Auditor, it’s worth giving the live site a scan just to make sure nothing got disrupted during the transfer.
Now Enjoy Your Lightning Fast Blocks Website!
You did it! Congratulations! You now have a beautiful website that is easily updated and managed using the block editor.
All that sweat equity should make you proud!
Need Help Converting Your Website to Blocks?
If converting your website to blocks is a bit above your ability, or you simply don’t have time, we offer a completely done-for-you blocks conversion service. You can watch me recreate one of my old websites in this (silent) film:
We’ve gotten the endorsement from blocks experts Adam Preiser (from the popular WPCrafter YouTube channel) and Dave Foy (creator of the No Stress WordPress course).
This means you can have your website converted to blocks, by experts, without having to lift a finger— all delivered with near pixel-perfect precision!
Prices start at just $1,000 and most websites can be completed in a week or less.
To learn more or get a quote, visit our Your Website Rebuilt with Blocks page.