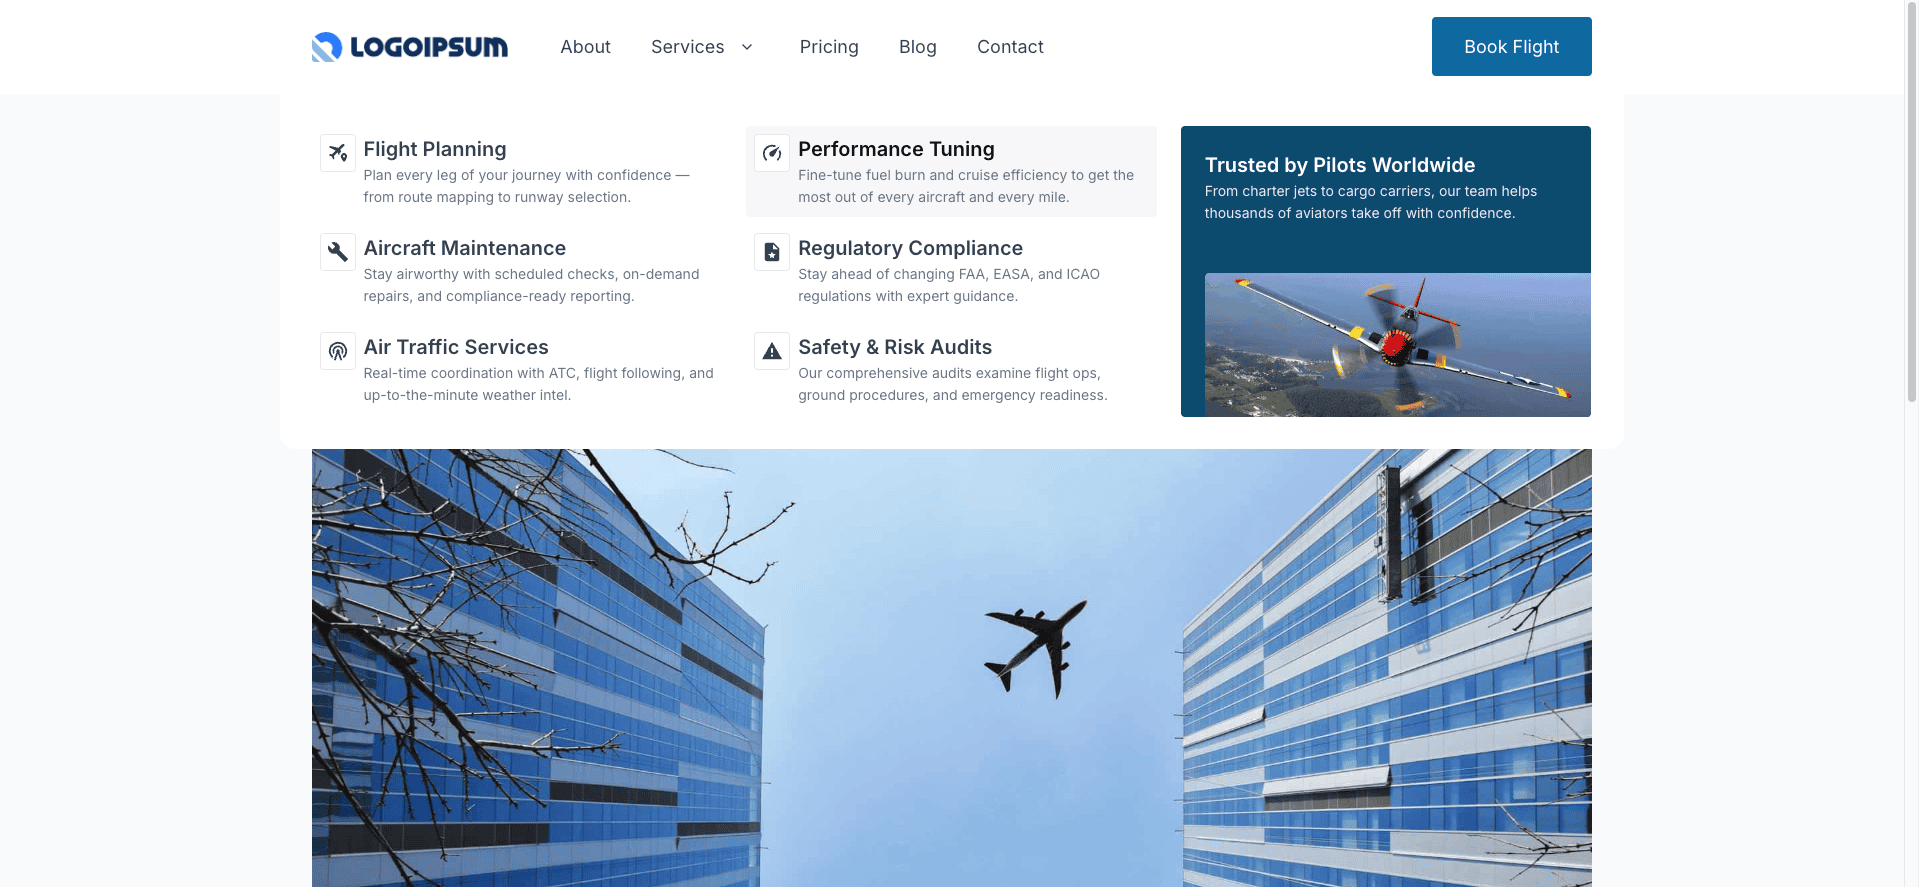
The team at Generate has finally released a long-awaited feature — a way to build powerful, flexible mega menus using blocks you already know. With the new Overlay Panels and Conditions system introduced in GenerateBlocks 2.3, creating advanced navigation layouts has never been easier.
In this post, I’ll walk you through setting up a fully functional mega menu using GenerateBlocks’ new tools — no extra plugins, no new blocks to learn. Just flexible layout control, inside the native block editor.
Note: This guide is based on a pre-alpha version of GenerateBlocks 2.3. Some UI elements or labels may change by the final release.
Step 1: Access the Overlay Panels
Once you’ve updated to GenerateBlocks 2.3, you’ll find two new options in the admin menu: Overlay Panels and Conditions.
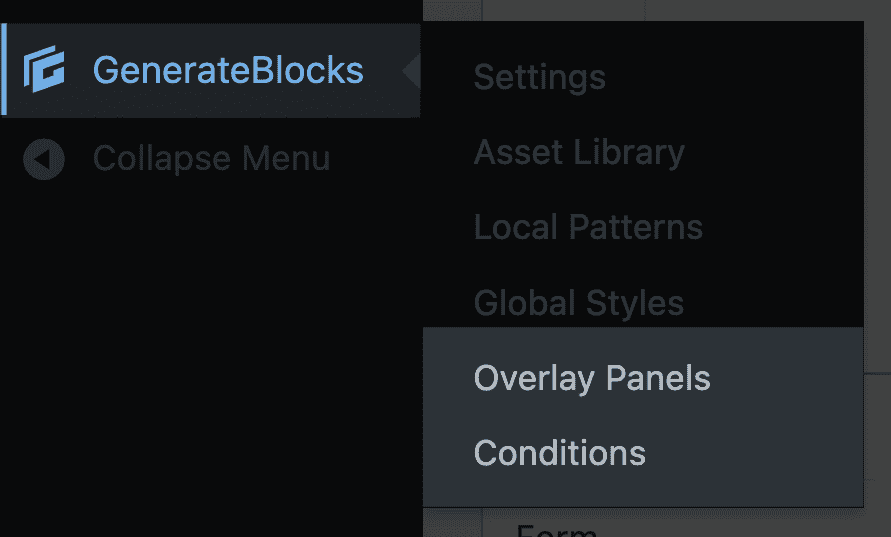
For this tutorial, we’re focusing on Overlay Panels. Conditions will be covered separately, as they unlock advanced use cases like personalization and block-level visibility controls.
Click on Overlay Panels, and you’ll be taken to a screen where you can create and manage panels.
Step 2: Create a New Mega Menu Panel
Click Add New to create your first panel.

- Give it a name (e.g.
Services Mega Menu) - In the settings sidebar, select Mega Menu as the panel type.
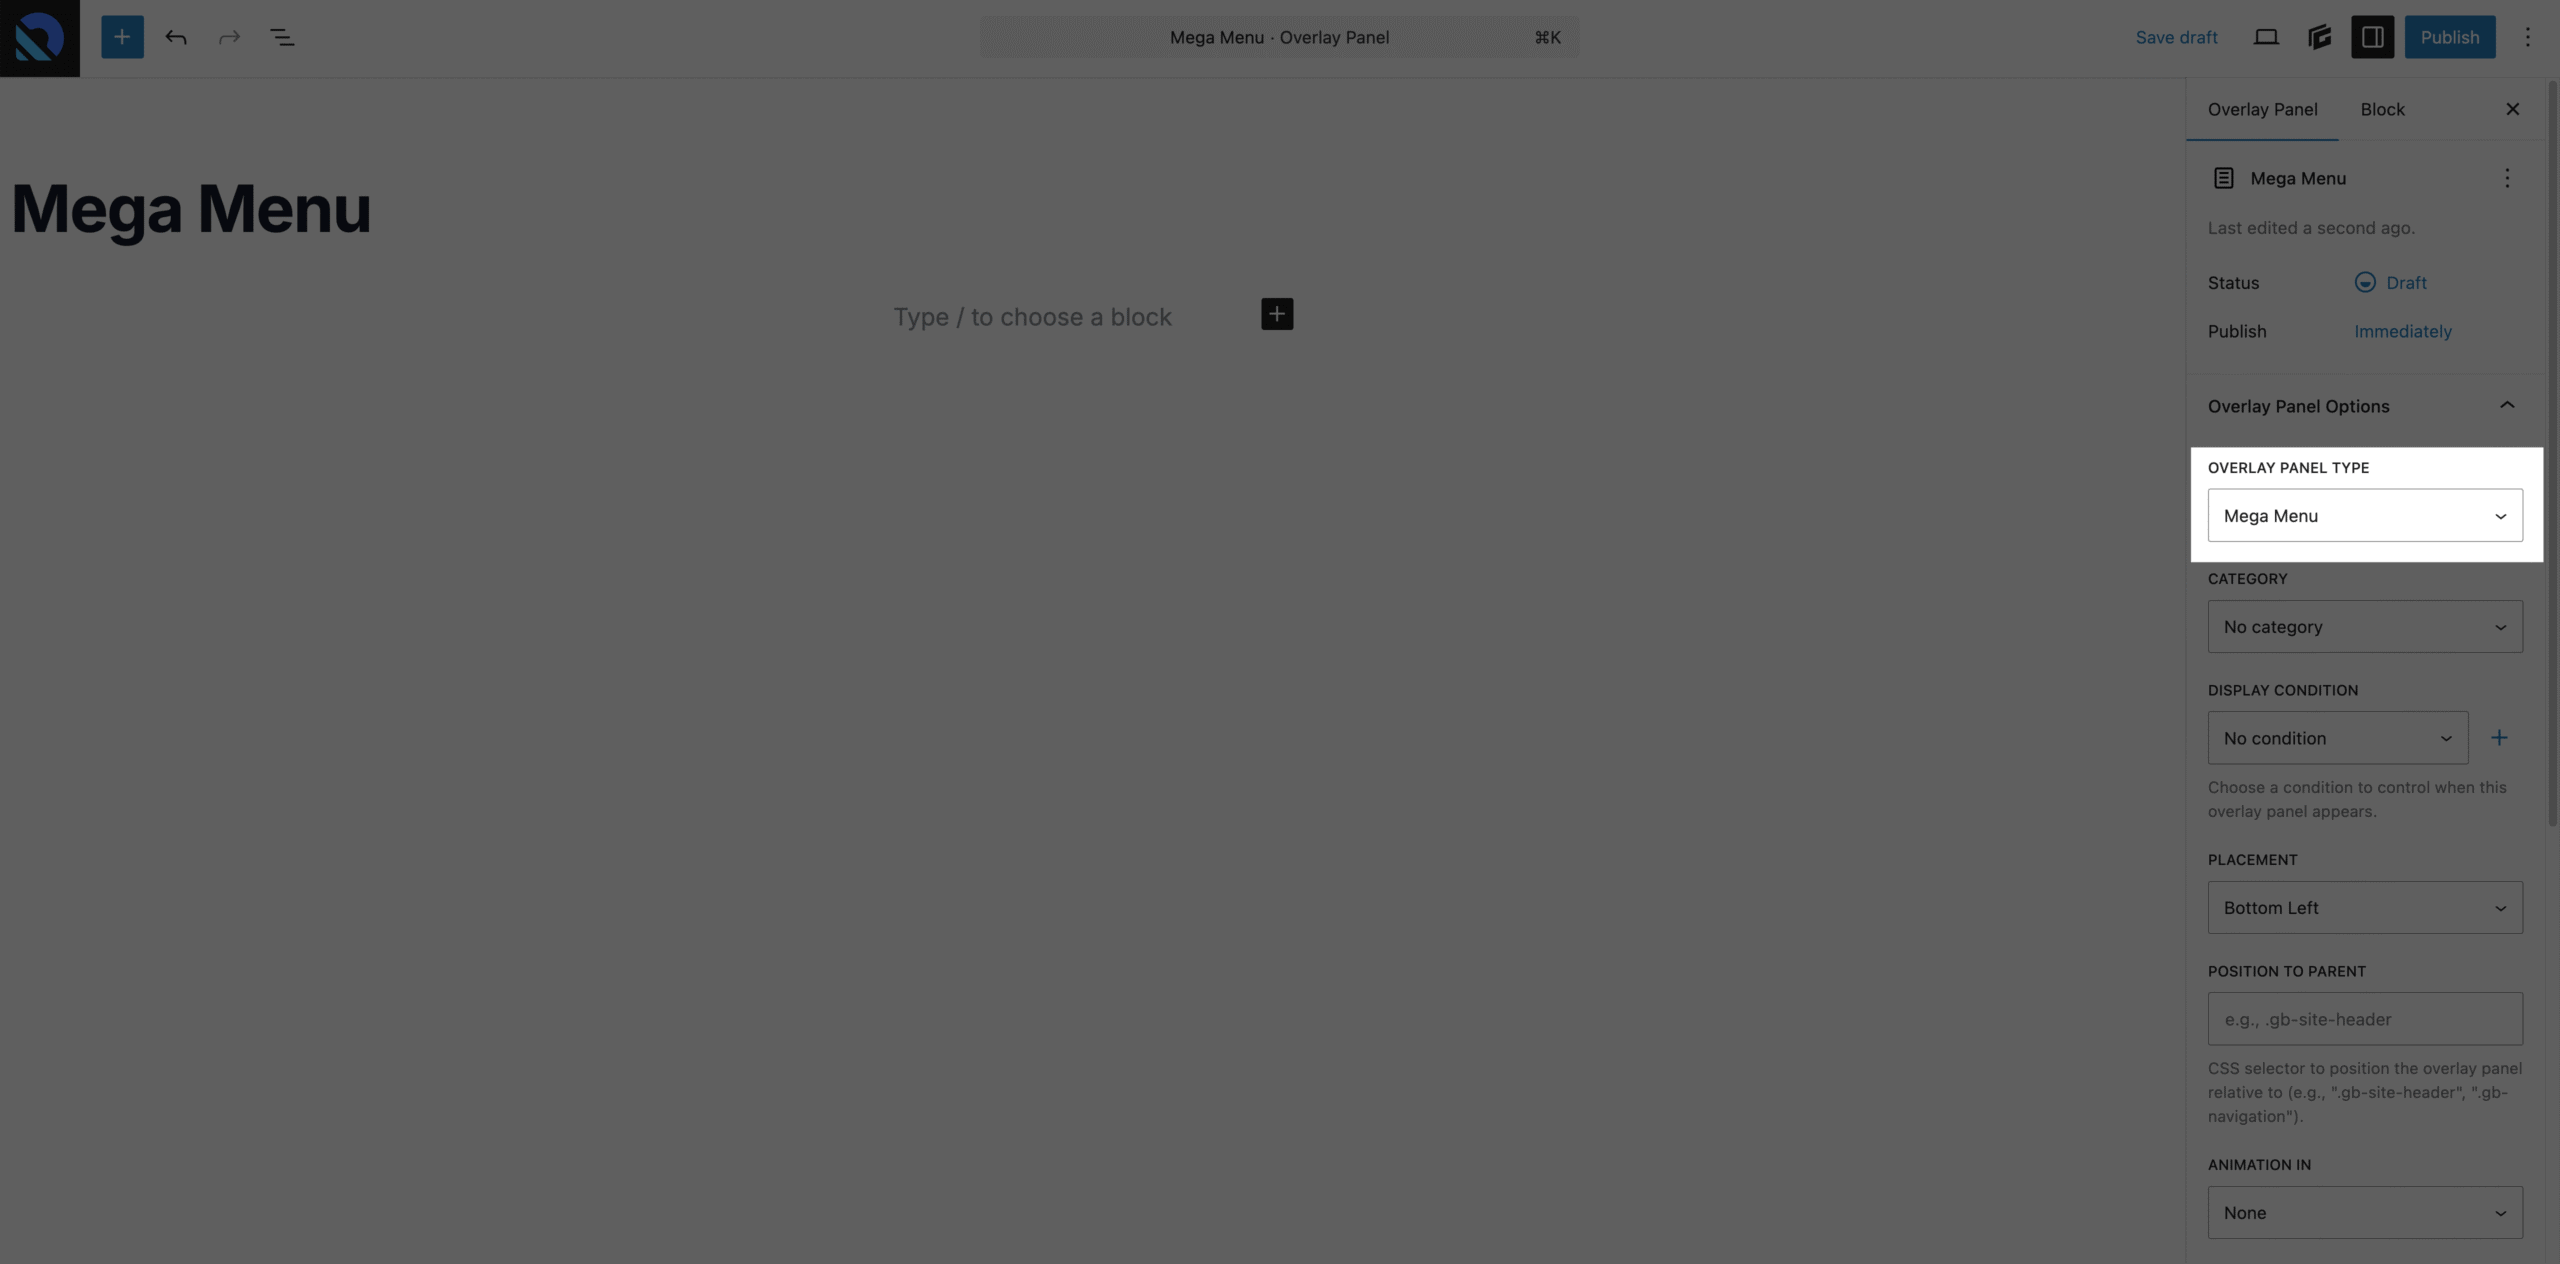
Other panel types (like Standard and Anchored) offer different behaviors, which I’ll cover in future tutorials.
Step 3: Configure Panel Settings
Once you’ve selected the Mega Menu type, you’ll see a few options:
- Display Conditions: Leave this as “No condition” — it’s not needed for this use case.
- Category: Optional, for organizing panels in large projects.
- Width Mode:
Fit content(default): Menu matches the width of its contents.Full width: Menu spans the entire screen.- For this tutorial, choose Full width and use a container inside the panel to limit the content width.
- Animation In/Out: Choose how your menu appears and disappears.
- Animation Duration: Leave blank to use the default.
- Animation Distance: Optional. Defaults (1rem) work well for most setups.
- Hover Buffer: Extends the hover trigger area. 20px feels natural and is the default.

Step 4: Build Your Mega Menu Content
This is where Generate’s implementation shines — you’re not locked into a rigid layout or custom UI. Instead, you can use any blocks (GenerateBlocks or otherwise) to build your mega menu content.
That means you can include:
- Containers and grids
- Buttons and links
- Images or SVGs
- Even embeds, like videos or third-party forms
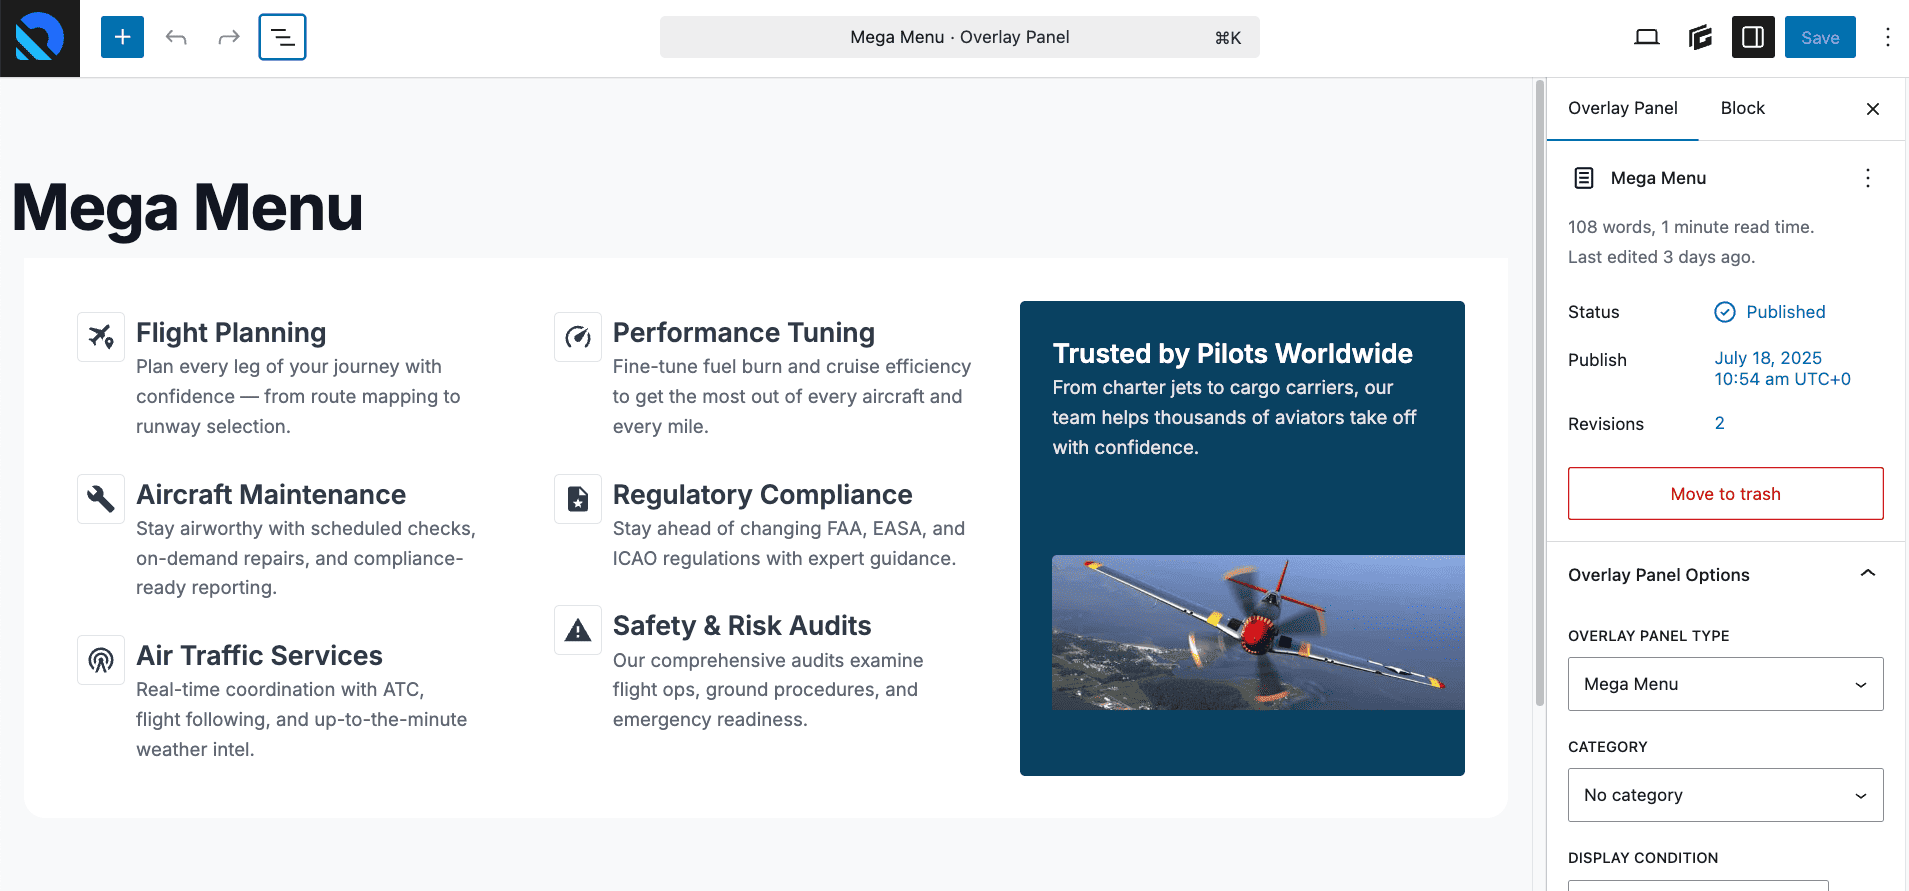
To speed up this tutorial, I’ve pasted in a prebuilt layout using a saved pattern. You could just as easily build your layout from scratch using the block editor.
Step 5: Control Layout with Inner Containers
If you chose Full Width earlier, you may want to limit your content’s width using a wrapping container.
Here’s how:
- Add a container block around your layout
- Under Sizing, set the Max Width to match your site’s content width
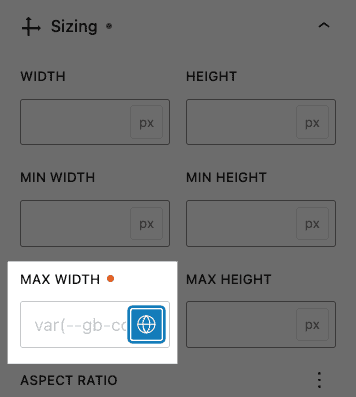
This gives you the best of both worlds — a menu that spans the screen but keeps your content aligned with the rest of your site.
Step 6: Attach the Mega Menu to Your Navigation
Now that your panel is built and saved, it’s time to link it to your WordPress menu.
- Go to Appearance → Menus
- Expand the menu item you want to attach the panel to
- You’ll see a new dropdown labeled Mega Menu — choose your panel from the list
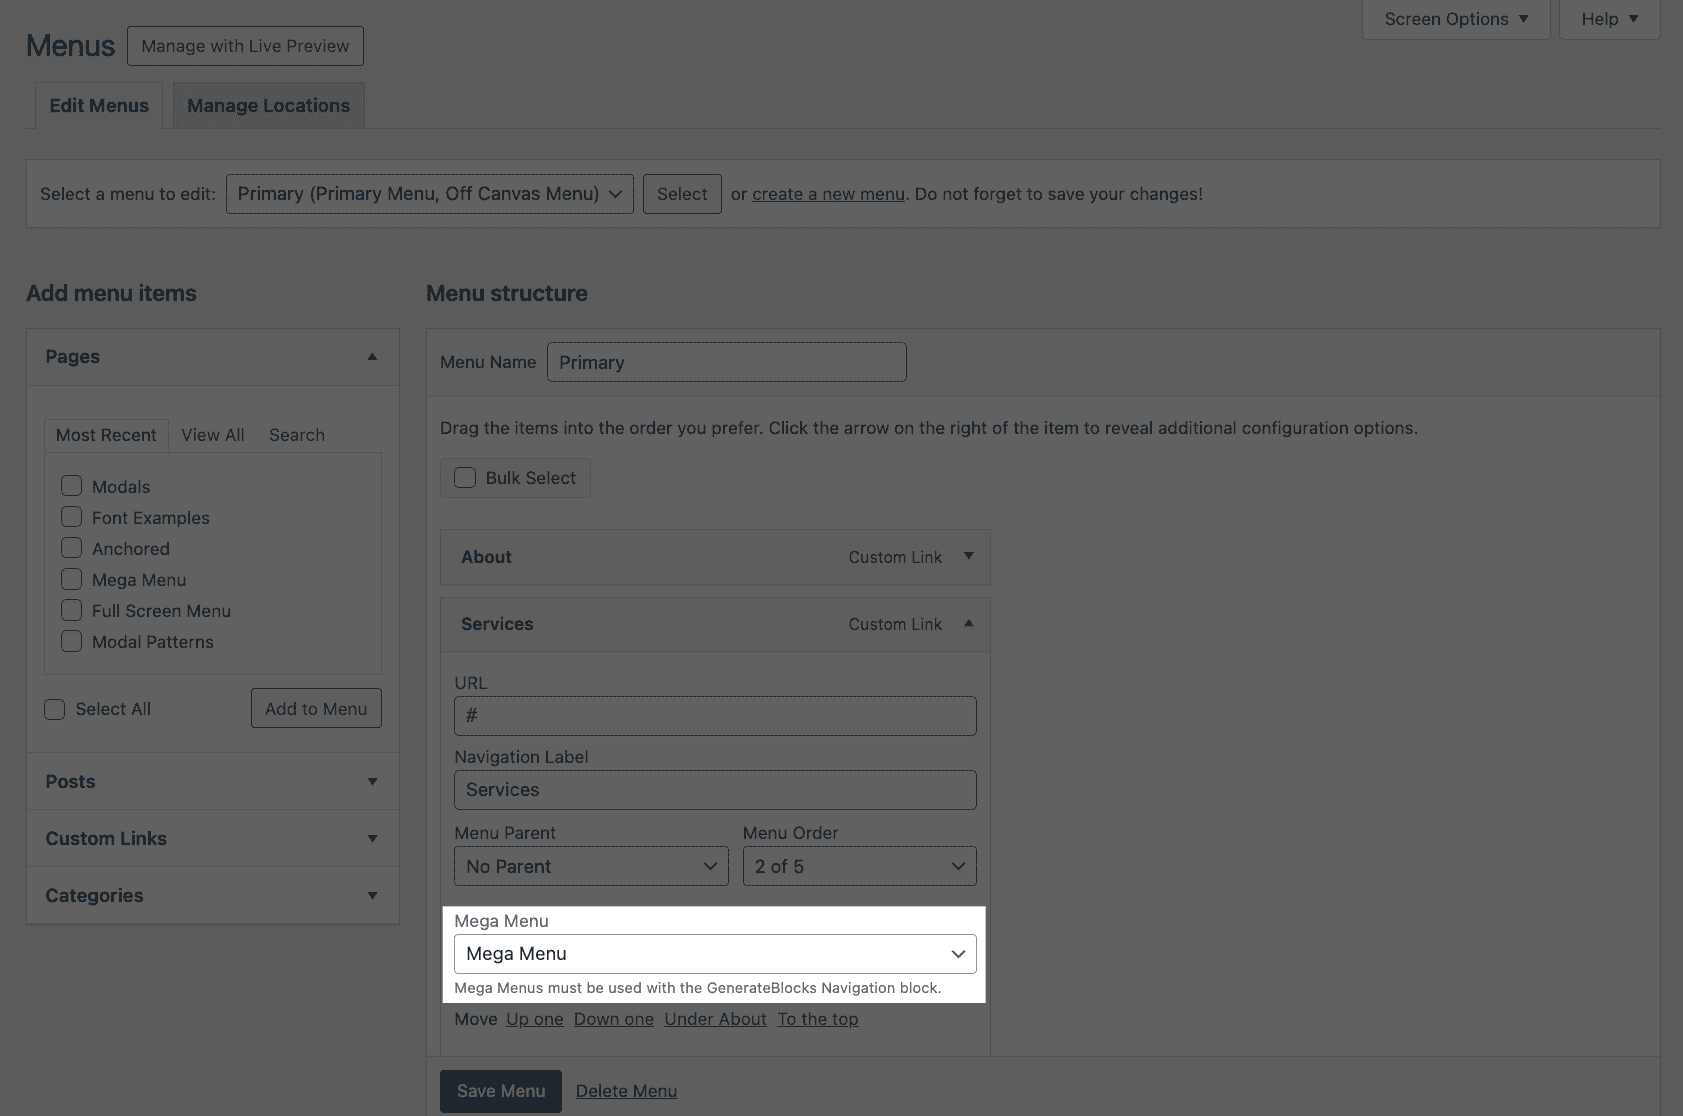
Click Save Menu, and your mega menu is now live!
Step 7: Preview and Edit from the Front End
On the front end, hover over your menu item and your mega menu should appear — complete with animations and your custom layout.

Want to tweak the layout or content later? You can access Overlay Panels in two ways:
- From the admin menu under GenerateBlocks → Overlay Panels
- From inside any page/post/element using the GenerateBlocks icon at the top of the editor
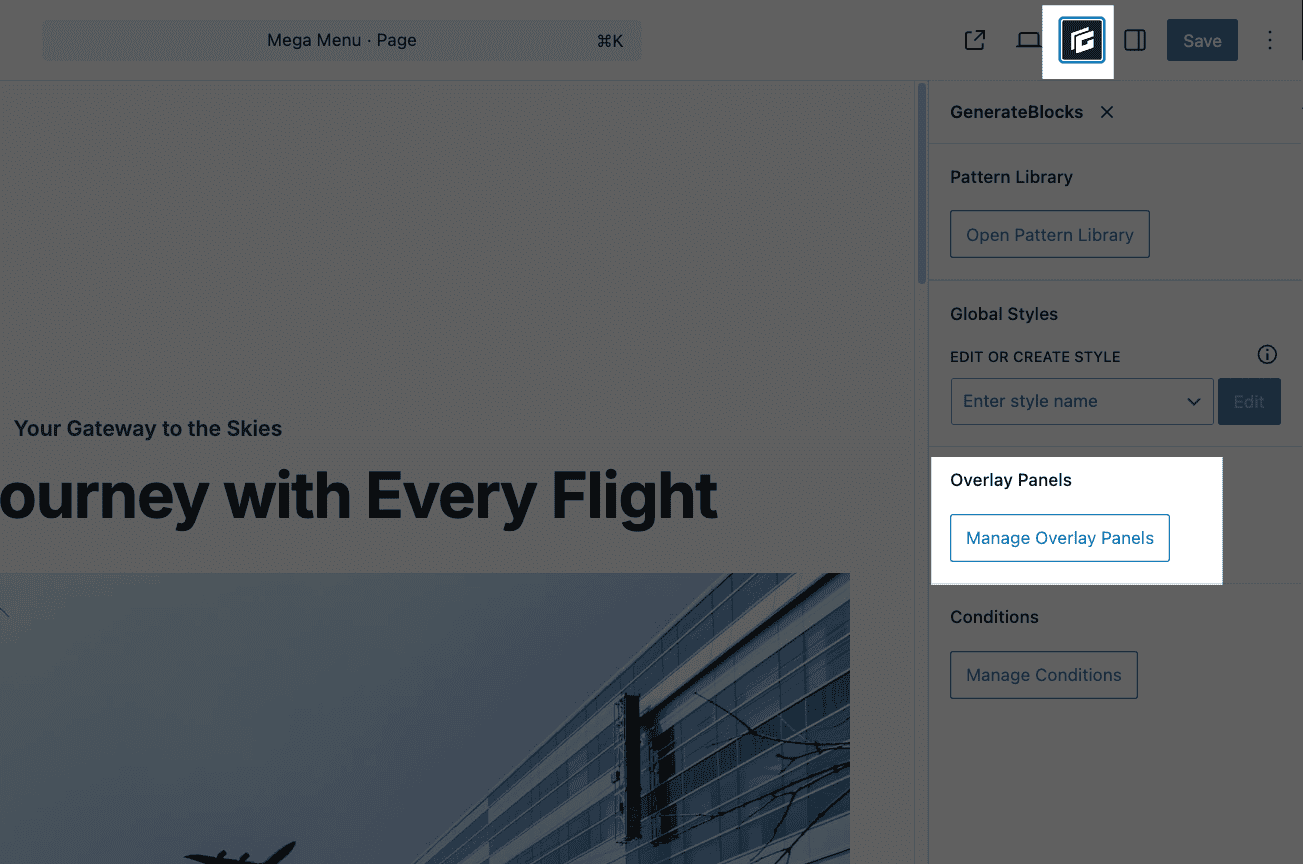
Clicking this brings up an inline editor for your modals, saving you time by letting you edit without navigating away.
Important: Compatibility Note
Mega Menus only work with the GenerateBlocks Navigation block, which was introduced in a recent release. If you’re still using the older GeneratePress menu system, you’ll need to rebuild your header using:
- The Site Header block
- The Navigation block
- Wrapped in an Element (like a Block Element or Header Element)
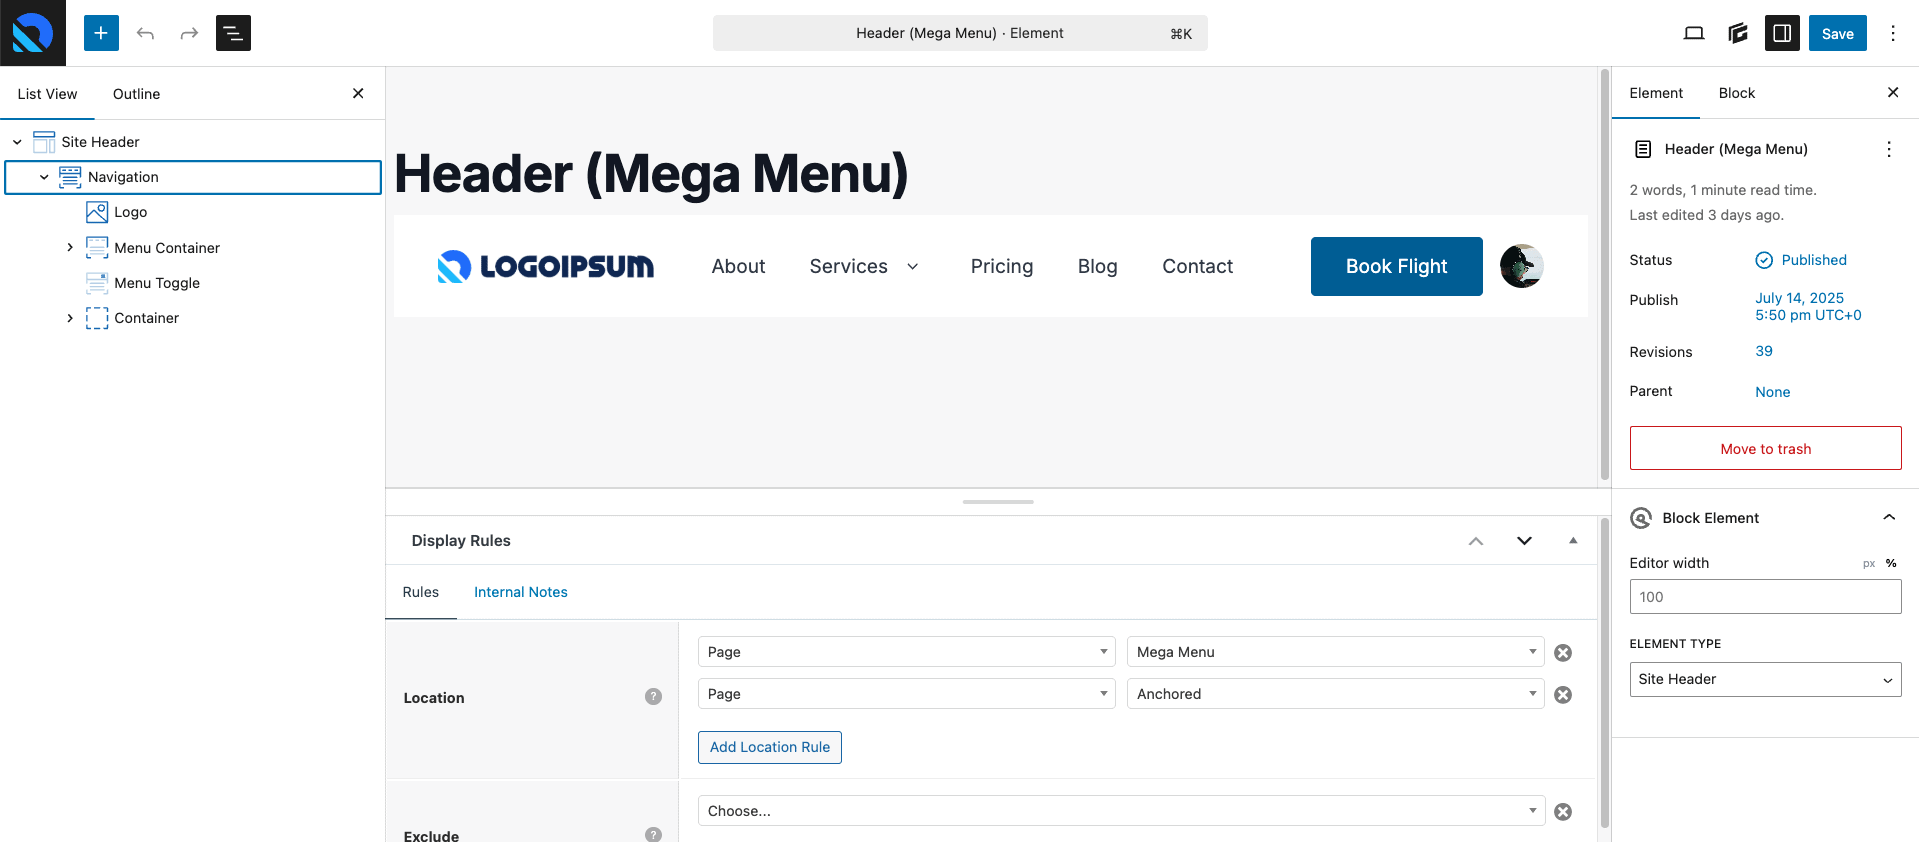
If you’re not using this setup, the mega menu feature won’t work. I recommend checking out my tutorial on rebuilding your header with GenerateBlocks if you’re still on the legacy system.
Final Thoughts
The new mega menu functionality in GenerateBlocks 2.3 is everything I hoped it would be — powerful, flexible, and built entirely on the block editor.
There are a lot of possibilities here, and this post just scratched the surface. I’ll be doing more in-depth tutorials, including accessibility best practices and custom layouts, in future posts.
Speaking of accessibility: While GenerateBlocks handles a lot of the markup and keyboard navigation for you, it’s still up to you to build responsible layouts inside the menu. Avoid stuffing it with too much content, test with keyboard navigation, and aim for clear focus states and hierarchy.
If you would like to see all of this in action, watch my video which covers this entire tutorial:
If this walkthrough helped you get a better grasp of the new mega menu system in GenerateBlocks, but you’d rather have someone handle the heavy lifting for you — that’s exactly what I do.
At OGAL Web Design, I specialize in building custom WordPress sites using GeneratePress and GenerateBlocks — and that includes fully customized mega menus like the one you just saw here.
Whether you need a hand implementing this on your own site, want help rebuilding your header to support this feature, or you’re looking for a developer who actually understands how to get the most out of these tools — I’d love to chat.
